Z370 and Z390 Intel chipsets was released back in 2017 and 2018 years and they still are mainstream now. There are many motherboards based on Z370 and Z390 chipsets containing 2 or more M.2 sockets. Those motherboards might accommodate NVMe SSD storages with RAID 0 or 1 built on Intel® Rapid Storage Technology.
ASRock Z370 Pro4 and ASUS Prime Z390-A motherboards are used in the article to build RAID 1 on WD Blue SN550 1TB and Intel 660P 1TB NVMe SSDs.
The performnce of NVMe SSDs can be observed in NVMe RAID Performance on Z390 Chipset Motherboard article.
Those two motherboards and NVMe SSDs work unstable in bootable RAID 1 configuration. It seems the chipsets are not aimed to be used in that role. After installing Windows 10 on RAID 1, both motherboards are constantly doing two steps: rebuilding RAID and crashing Windows.

There are 2 ways to fix it. The first way is to use ASUS HYPER M.2 X16 CARD V2 adapter. It is only applicable to ASUS motherboard as ASRock motherboard is lack of bifurcation. The second way is to make your motherboard cooler running CPU and motherboard fans on 80% or more of their capacity. Also, it can be used non-bootable RAID.
Intel 660P NVMe is only supported by ASUS HYPER M.2 X16 CARD V2 adapter as the adapter accepts Intel NVMe SSDs for Z370 and Z390 chipsets. WD Blue SN550 is recognized but RAID can't be built and it works unstable as well.
Installing RAID on ASRock Z370 Pro4 motherboard
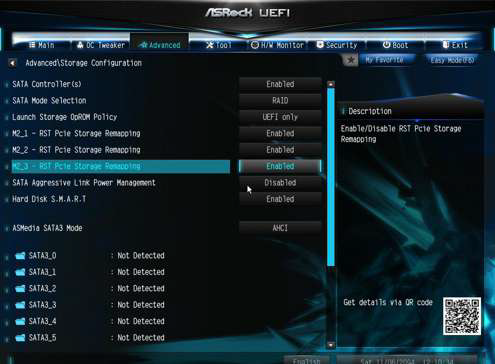
Enable RAID in BIOS.
- Enter Advanced menu.
- Click Storage Configuration menu.
- Switch SATA Operation Mode option to Raid.
- Enable remapping of installed PCIE SSD M.2 slots.
- Save BIOS setting.
- Exit BIOS setup.
- Reboot computer.
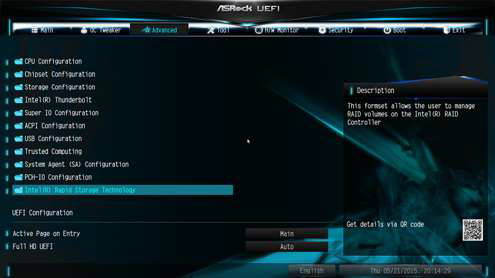
Create a RAID volume.
- Enter Advanced menu.
- Click Intel Rapid Storage Technology. This item is available only if Raid mode is enabled.
- Create RAID.
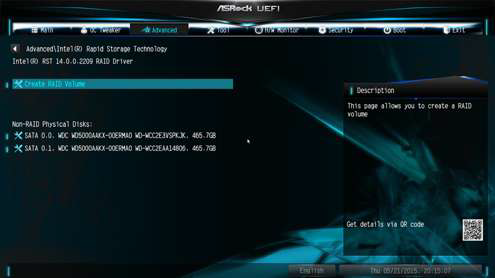
After the RAID setup completed, Windows 10 can be installed. Windows 10 does not request any additional drivers as BIOS handles everything transparently.
Installing Raid on ASUS Prime Z390-A motherboard
The easiest way to set up Raid is EZ Tuning Wizard. It takes care of all settings.
Run EZ Tuning Wizard from BIOS landing screen.
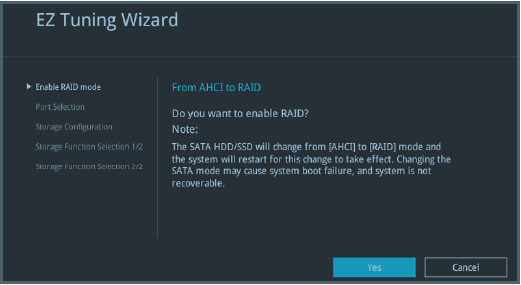
Select PCIE mode
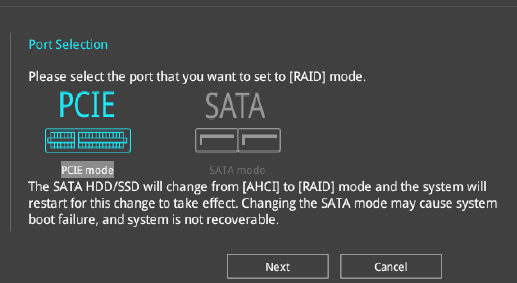
Follow wizard.
After the RAID setup completed, Windows 10 can be installed. Windows 10 does not request any additional drivers as BIOS handles everything transparently.
Installing RAID with ASUS HYPER M.2 X16 CARD V2 adapter
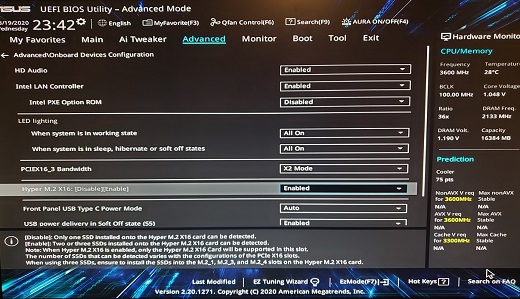
Enable the adapter in BIOS
Pay attention to information how many NVMe SSDs can be used in the adapter and what slots can be occupied. In the sample below, M.2_1, M.2_3, and M.2_4 are usable slots and it can be maximum 3 NVMe SSDs.
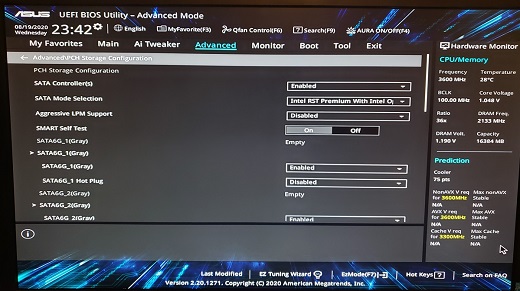
Switch to RAID mode in SATA Mode Selection
Reboot computer
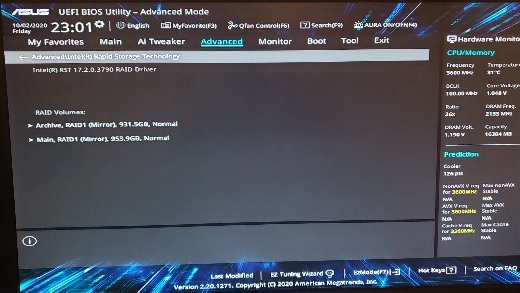
Create a RAID volume.
- Enter Advanced menu.
- Click Intel Rapid Storage Technology. This item is available only if RAID mode is enabled.
- Create RAID.
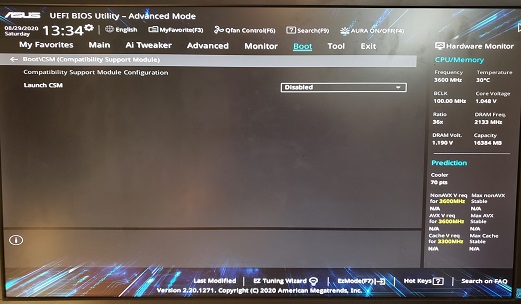
Switch Launch CSM to Disabled in Boot menu
After the RAID setup completed, Windows 10 can be installed. Windows 10 requests drivers and they can downloaded from the motherboard support page and located in SATA section. Extract drivers and write to USB with Windows 10 installation.
Comments
comments powered by Disqus