WWW website prefix has long history and it was used to classify information what was exposed to users of websites. Another usage of WWW might be for load balancing when web traffic is redirected to a cluster of web servers. Also, some sources tell that WWW was introduced accidently as a mistake but everybody considered it as the new standard and started using it. WWW is not required to be used in URLs.
In any case, we need to address this prefix to keep back compatibility with the old rules. It means that www.sample.com, https://www.sample.com, and https://www.sample.com URLs should be valid and converted to https://www.sample.com one to make a Web connection secured.
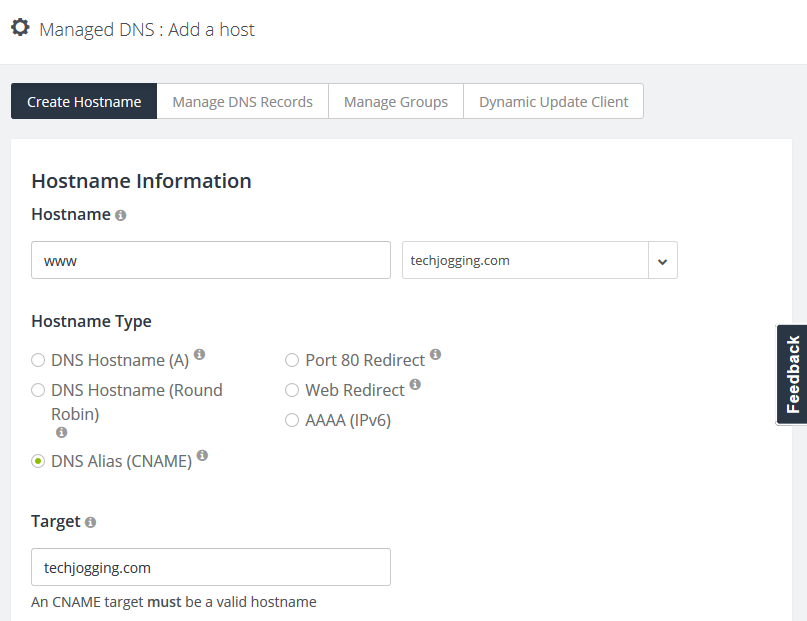
1. Add WWW CNAME record to DSN.
The sample is based on noip.com DSN service.
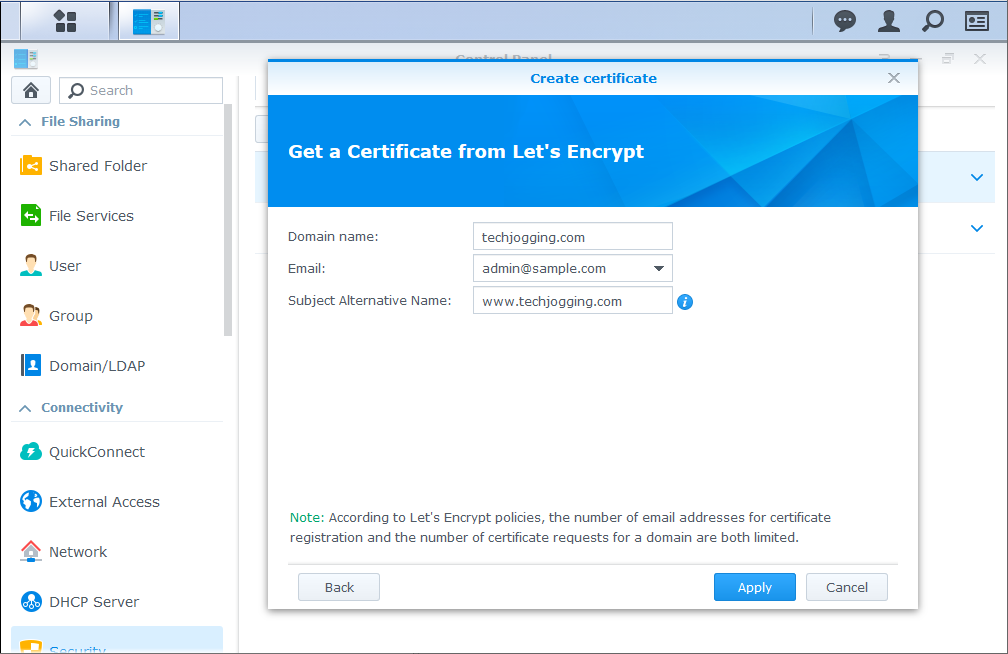
2. Create SSL Certificate in Synology DiskStation Manager (DSM)
The easiest way to create a SSL certificate is Synology DSM which supports Let's Encrypt natively. Make sure to add WWW to Subject Alternative Name.
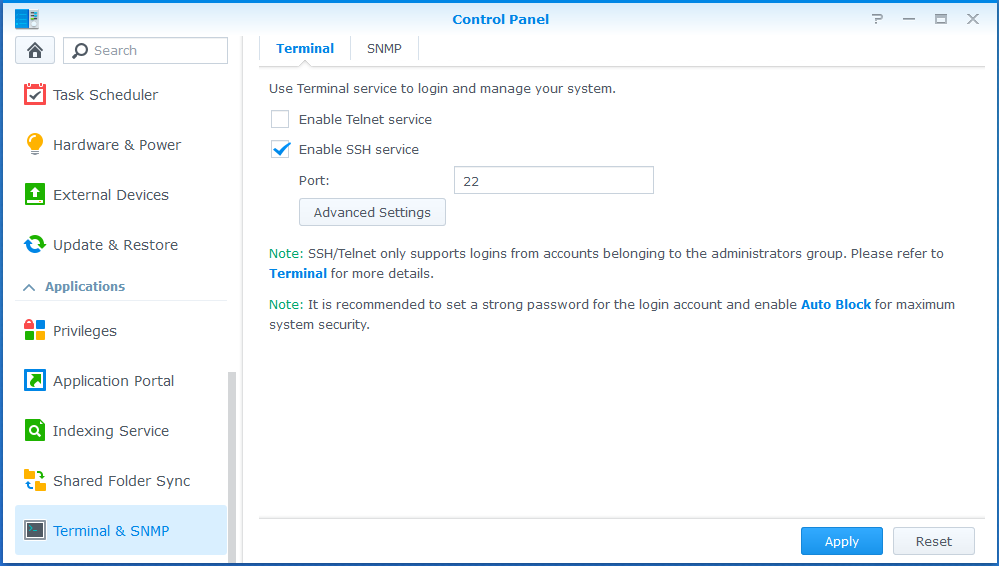
3. Enable SSH service.
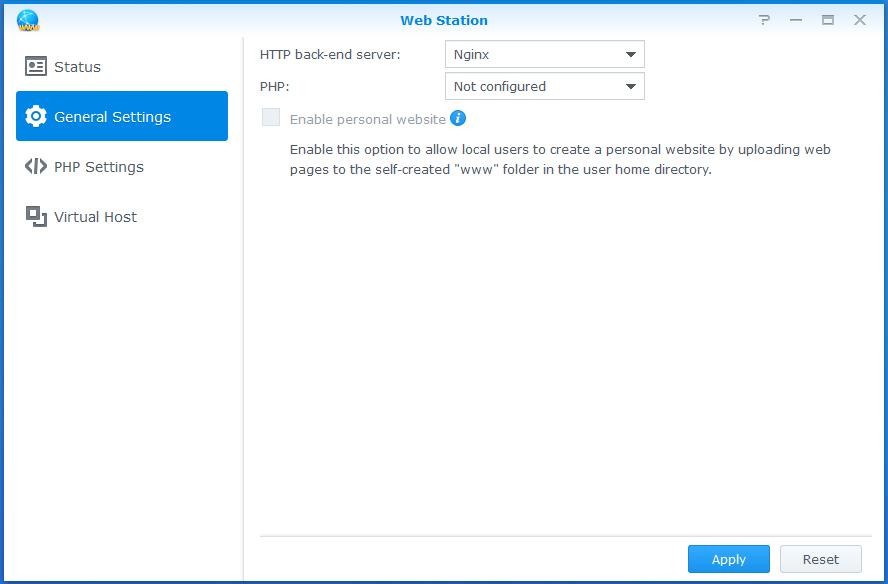
4. Install Web Station.
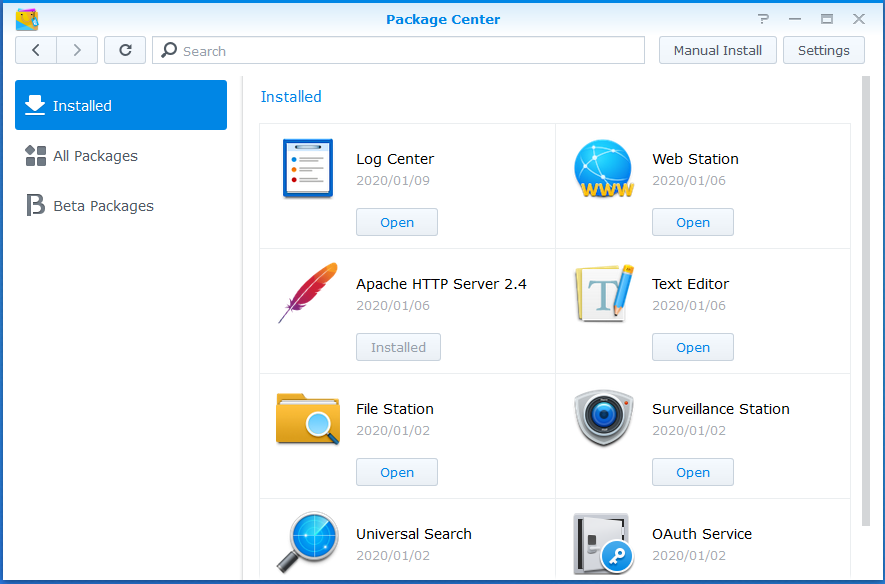
5. Make Nginx Web Server as Default.
6. Modify Moustache Template
Sample is based on DSM 6.2.2 operation system and the original moustache template is.
server {
    listen 80 default_server{{#reuseport}} reuseport{{/reuseport}};
    listen [::]:80 default_server{{#reuseport}} reuseport{{/reuseport}};

    gzip on;

    {{> /usr/syno/share/nginx/WWW_Main}}

    location ~ ^/$ {
        rewrite / http://$host:{{DSM.port}}/ redirect;
    }
}

server {
    listen 443 default_server ssl{{#reuseport}} reuseport{{/reuseport}};
    listen [::]:443 default_server ssl{{#reuseport}} reuseport{{/reuseport}};
    {{#DSM.https.compression}}
    gzip on;
    {{/DSM.https.compression}}

    {{> /usr/syno/share/nginx/WWW_Main}}

    location ~ ^/$ {
        rewrite / https://$host:{{DSM.ssl.port}}/ redirect;
    }
}
Use ssh client to access your Synology NAS with a user which has administrative permission. It can be PuTTY tool in Windows or terminal with
sshcommand in Unix.Switch to root user
sudo su -
Back up the current moustache template
cp /usr/syno/share/nginx/WWWService.mustache /usr/syno/share/nginx/WWWService.mustache.bak
Open the moustache template for editing
vi /usr/syno/share/nginx/WWWService.mustache
Replace 4 lines in port 80 section
{{> /usr/syno/share/nginx/WWW_Main}}

location ~ ^/$ {
     rewrite / http://$host:{{DSM.port}}/ redirect;
}
with those 2 lines
server_name _;
 return 301 https://$host$request_uri;
The final content should be
server {
    listen 80 default_server{{#reuseport}} reuseport{{/reuseport}};
    listen [::]:80 default_server{{#reuseport}} reuseport{{/reuseport}};

    gzip on;

    server_name _;
    return 301 https://$host$request_uri;
}

server {
    listen 443 default_server ssl{{#reuseport}} reuseport{{/reuseport}};
    listen [::]:443 default_server ssl{{#reuseport}} reuseport{{/reuseport}};
    {{#DSM.https.compression}}
    gzip on;
    {{/DSM.https.compression}}

    {{> /usr/syno/share/nginx/WWW_Main}}

    location ~ ^/$ {
        rewrite / https://$host:{{DSM.ssl.port}}/ redirect;
    }
}
Restart the Nginx web server to apply the changes
synoservicecfg --restart nginx
The last important step is to refresh your browser. When you open your web site with http, it's still showing as http and don't redirect to https. Just click Ctrl-F5.
Comments
comments powered by Disqus