Enabling gzip compression for your website can be done in Synology DiskStation Manager (DSM). HTTP traffic is already compressed with gzip as default. HTTPS protocol needs to be enabled explicitly. Synology DSM is doing it in an easy step without rebooting Synology NAS. Also, Synology DSM includes text/javascript and text/css MIME types additional to text/html one.
1. Validate Compression
1.1 Firefox Web browser
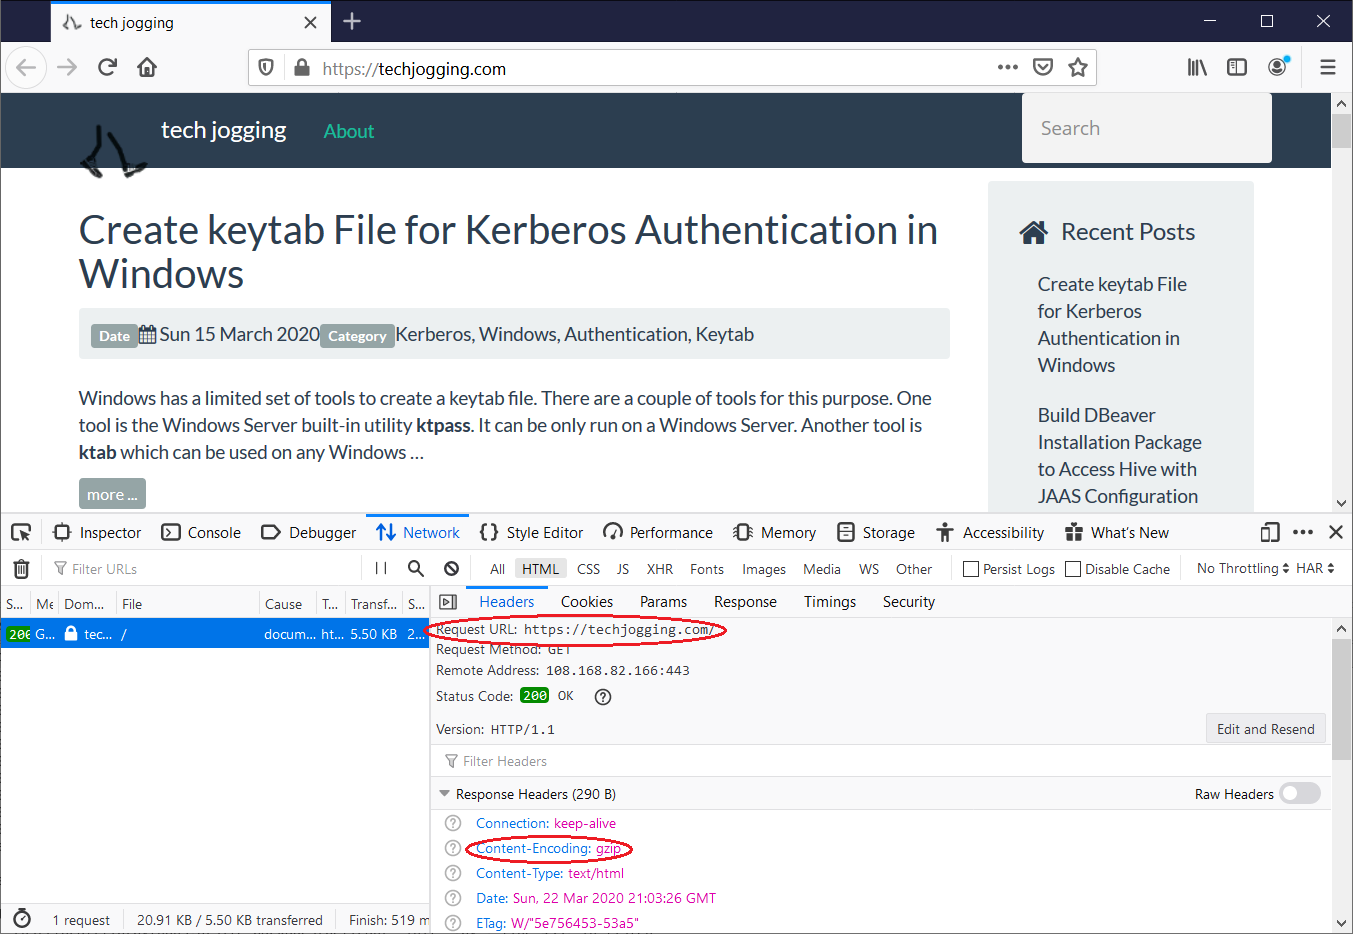
Open your website in Firefox browser
Click Shift-F12 to open Developer Tools panels.
Go to Network panel
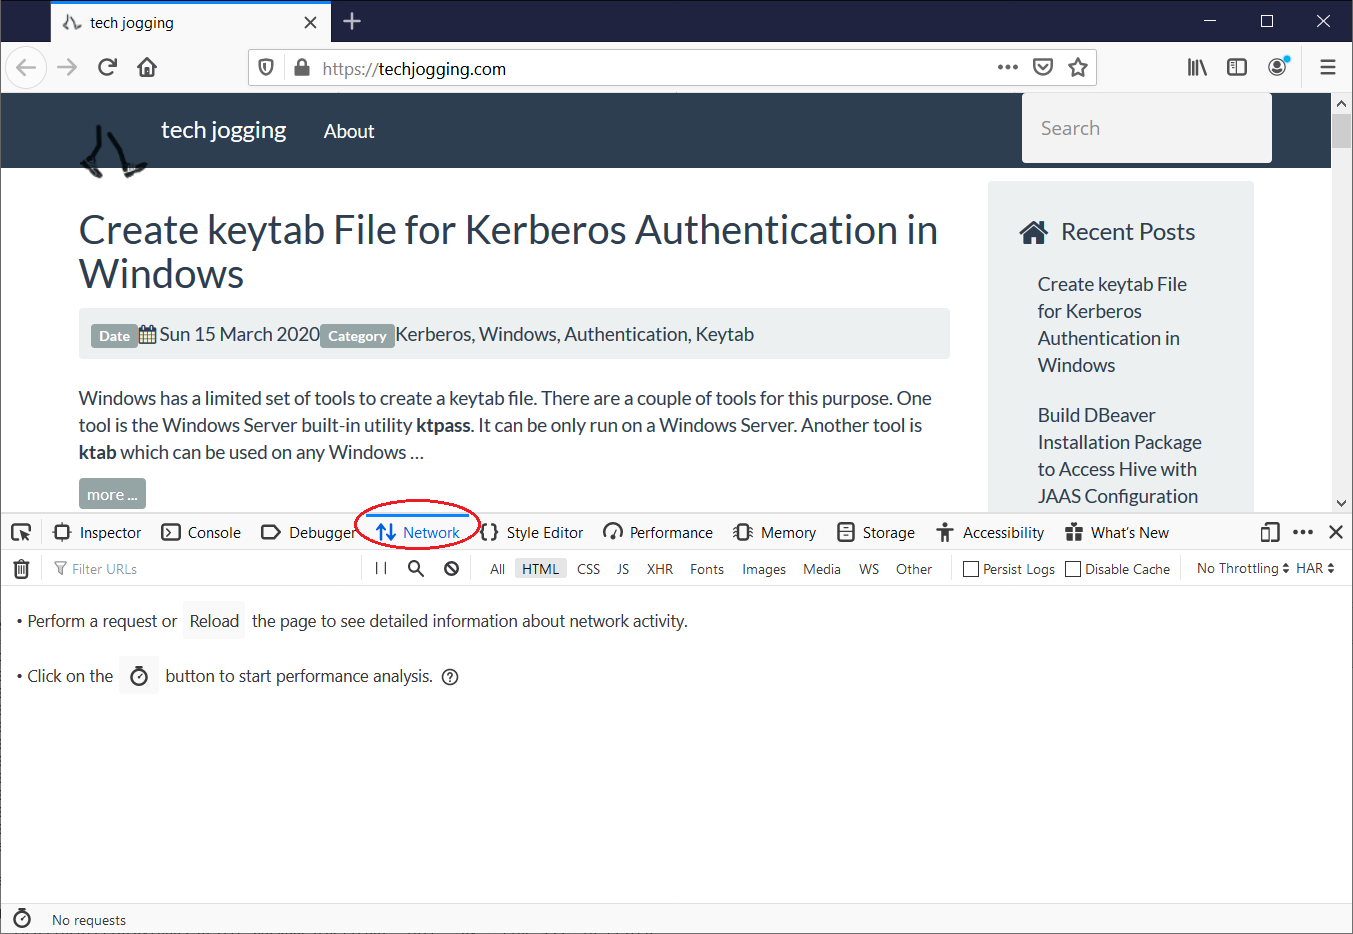
Click Reload button in the panel or Ctrl-F5 buttons to initiate your website data load.
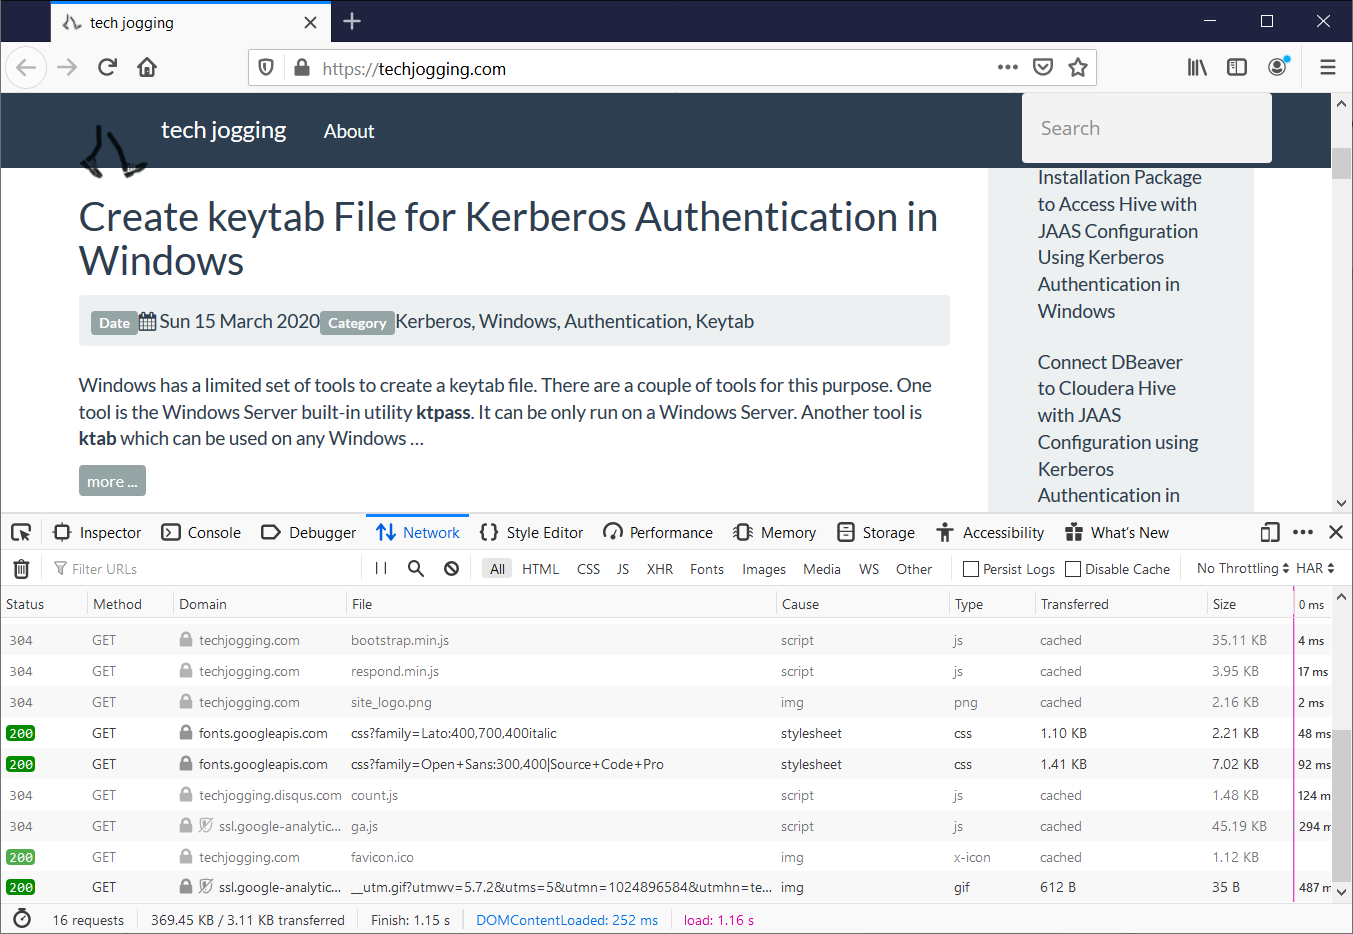
Filter resources which you are interested in. Those resources are: HTML, CSS, and JS, for example, HTML website root page.
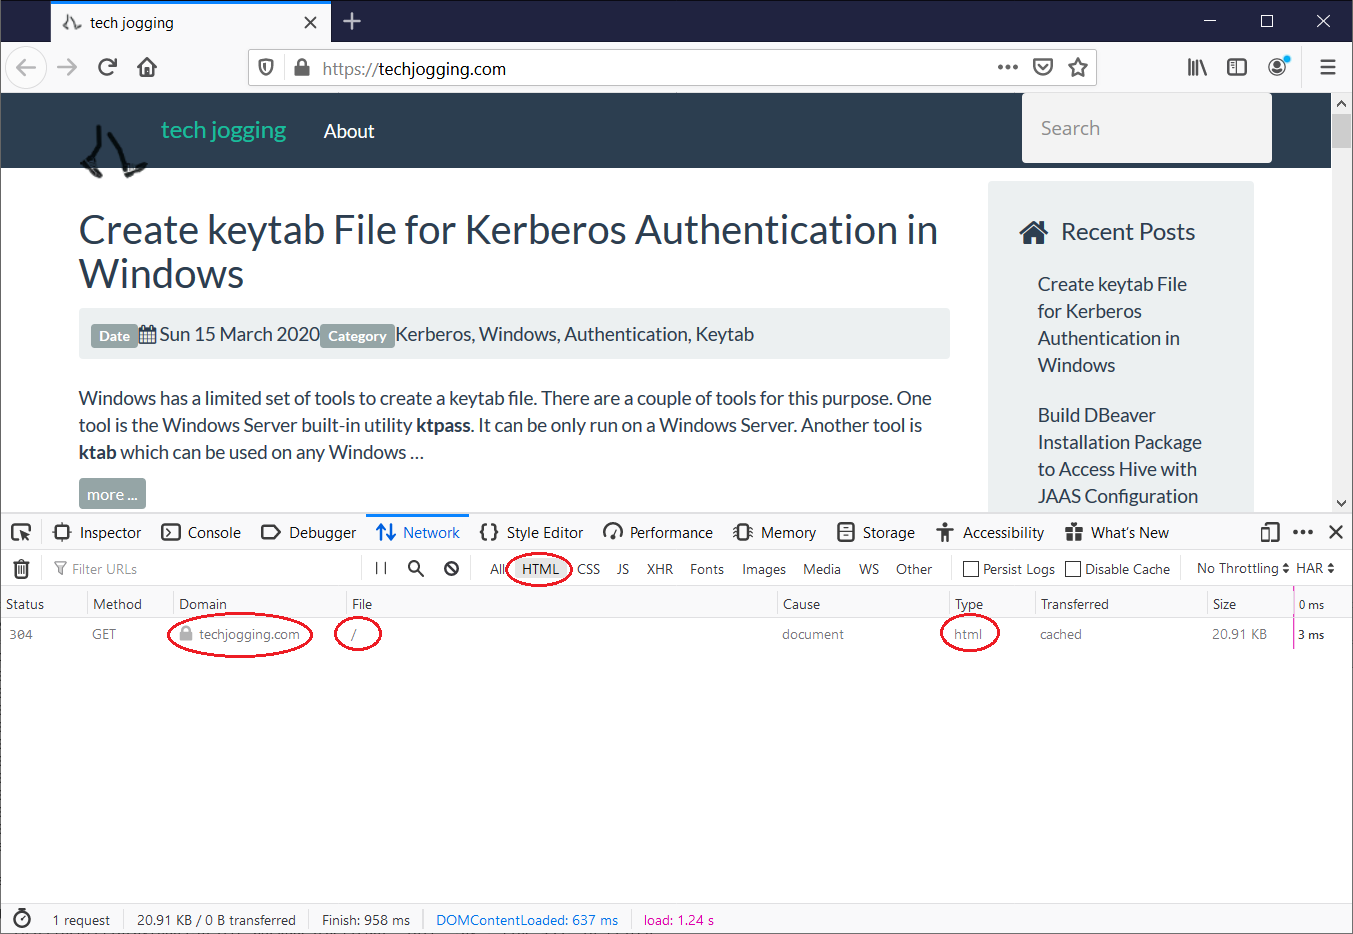
Click on a resource to see compression and other resource properties, for example, HTML resource.
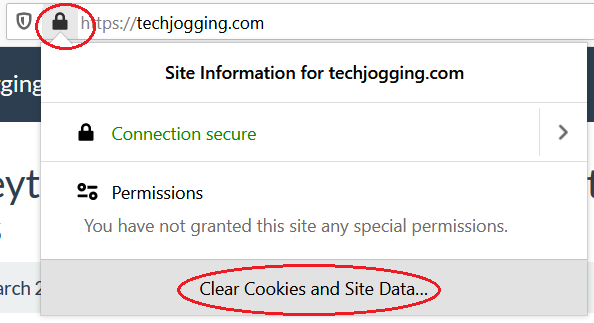
Clear cache.
Gzip compression is set up.
1.2 Chrome Web browser
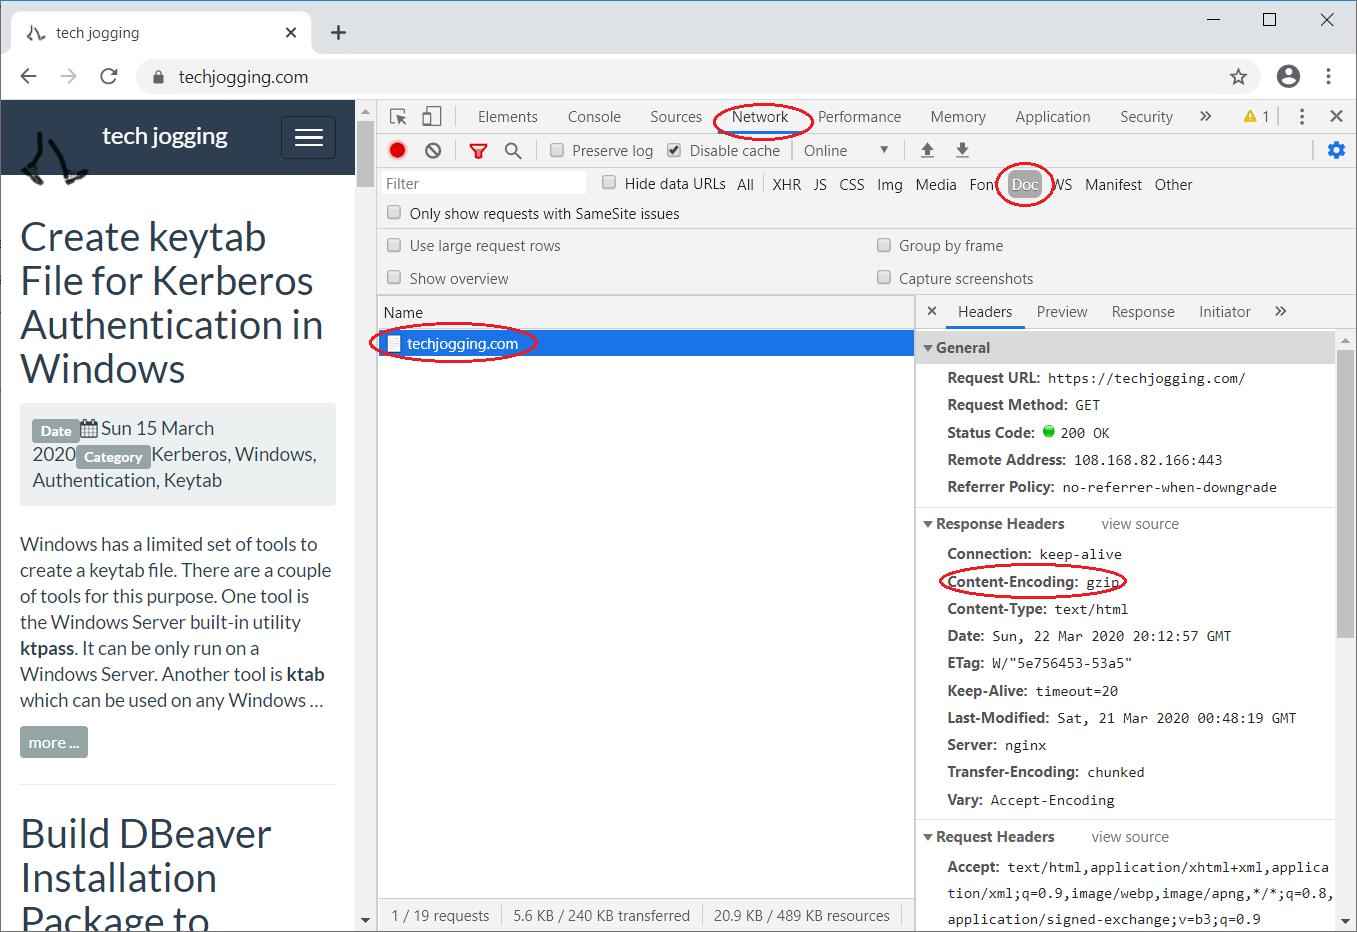
The steps to get information are very similar to Firefox. To open Chrome DevTools, press Command+Option+C (Mac) or Ctrl+Shift+C (Windows, Linux, Chrome OS).
2. Enable gzip Compression in DSM
Open Control Panel in Synology DiskStation Manager.
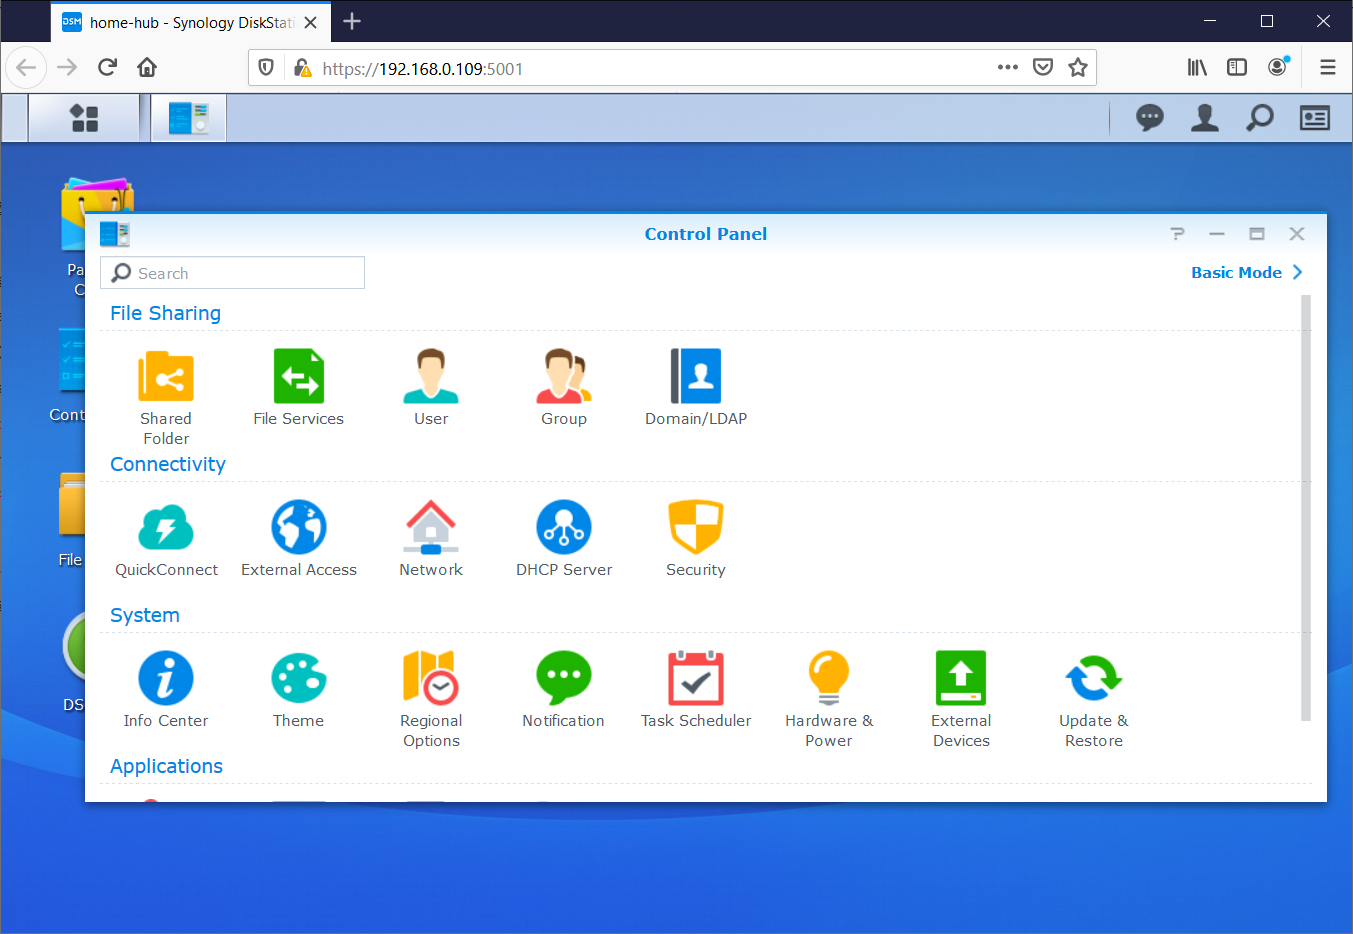
Go to Security settings.

Select Advanced tab and flag Enable HTTP Compression.
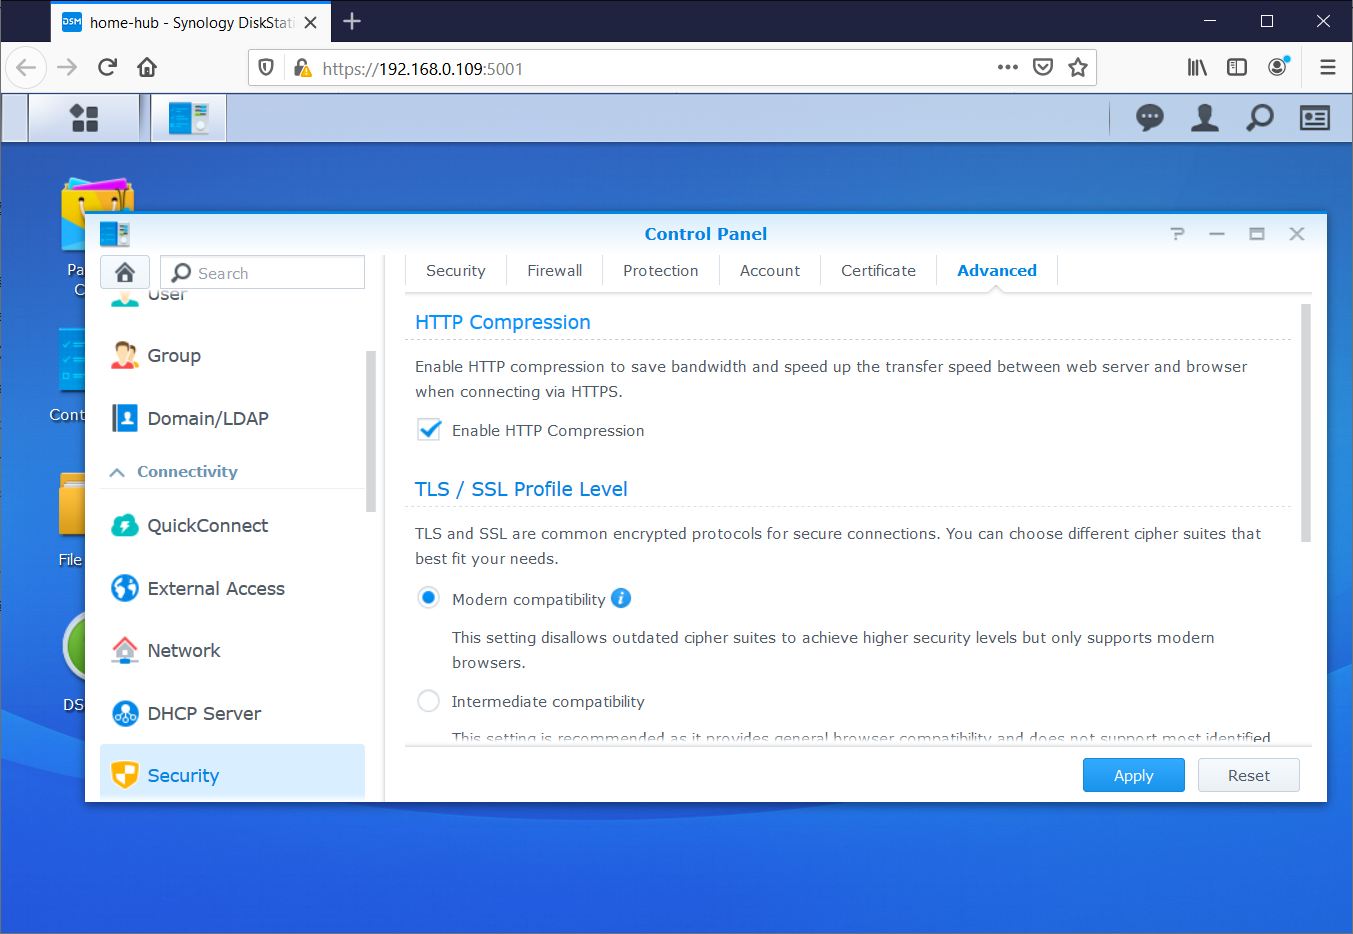
Apply the setting pressing Save button.
3. Include Different MIME Types
Compression is applied to HTML MIME type as default. Also, compression is applied to CSS and JS in Synology DSM. If compression is missing for CSS and JS resources, it can be set up.
The sample is based on DSM 6.2.2 operation system.
Use ssh client to access your Synology NAS with a user which has administrative permission. It can be PuTTY tool in Windows or terminal with
sshcommand in Unix.Switch to root user.
sudo su -
Back up the current moustache template.
cp /usr/syno/share/nginx/WWWService.mustache /usr/syno/share/nginx/WWWService.mustache.bak
Open the moustache template for editing.
vi /usr/syno/share/nginx/WWWService.mustache
Add a line after
gzip on;command to both HTTP and HTTPS server sections.gzip_types text/javascript text/css;
The final content should be.
server {
    listen 80 default_server{{#reuseport}} reuseport{{/reuseport}};
    listen [::]:80 default_server{{#reuseport}} reuseport{{/reuseport}};

    gzip on;
    gzip_types text/javascript text/css;

    {{> /usr/syno/share/nginx/WWW_Main}}

    location ~ ^/$ {
        rewrite / http://$host:{{DSM.port}}/ redirect;
    }
}

server {
    listen 443 default_server ssl{{#reuseport}} reuseport{{/reuseport}};
    listen [::]:443 default_server ssl{{#reuseport}} reuseport{{/reuseport}};
    {{#DSM.https.compression}}
    gzip on;
    gzip_types text/javascript text/css;
    {{/DSM.https.compression}}

    {{> /usr/syno/share/nginx/WWW_Main}}

    location ~ ^/$ {
        rewrite / https://$host:{{DSM.ssl.port}}/ redirect;
    }
}
Restart the Nginx web server to apply the changes.
synoservicecfg --restart nginx
Comments
comments powered by Disqus