When your organization has decided to start using DBeaver, you need to plan how to deploy and setup DBeaver for users. It might not be an issue if you are going to utilize databases/drivers which included in the standard configuration. But let's imagine case when you need to connect to Hive with Kerberos authentication. This task request advanced skills and time for troubleshooting in case of encountering any issues.
Setup
The following sample based on Cloudera Hive JDBC driver v. 2.6.5.1007 and DBeaver EE v. 6.3.0 64 bit or DBeaver CE v. 7.0.0 64 bit edition.
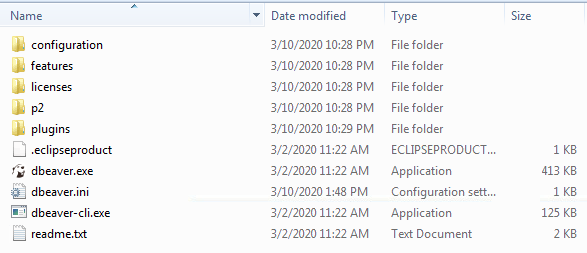
DownloadWindows 64 bit (zip) DBeaver installation and unzip it, for example, to C: drive. Your root folder is C:\dbeaver-ce-7.0.0-win32.win32.x86_64.
Download and unzip Cloudera Hive JDBC driver. Place it in C:\dbeaver-ce-7.0.0-win32.win32.x86_64\DBeaverData\drivers folder.
C:\dbeaver-ce-7.0.0-win32.win32.x86_64\DBeaverData
└───drivers
    └───hive_jdbc_2.6.5.1007
        ├───ClouderaHiveJDBC41-2.6.5.1007
        │       HiveJDBC41.jar
        │
        └───docs
                Cloudera-JDBC-Driver-for-Apache-Hive-Install-Guide.pdf
                Cloudera-JDBC-Driver-for-Apache-Hive-Release-Notes.txt
                third-party-licenses.txt
Copy or modify the following configuration files in C:\dbeaver-ce-7.0.0-win32.win32.x86_64 DBeaver root folder. You can figure out how make them from Connect DBeaver to Cloudera Hive with JAAS Configuration using Kerberos Authentication in Windows article.
1) dbeaver.ini
2) jaas.conf
3) krb5.ini
4) organization-service-account.keytab
Create dbeaver.vbs file and placed in C:\dbeaver-ce-7.0.0-win32.win32.x86_64 DBeaver root folder as well. This file is a DBeaver launcher and our goal is to redirect DBeaver workspace from Windows User Home folder to DBeaver root one. We could create Windows batch file but it would show Command Prompt window during DBeaver start.
Set WshShell = CreateObject("WScript.Shell")
WshShell.Run "dbeaver.exe -data ./DBeaverData/workspace6", 0
Set WshShell = Nothing
Run DBeaver with dbeaver.vbs launcher and create a Hive driver and a new Hive connection as per Connect DBeaver to Cloudera Hive with JAAS Configuration using Kerberos Authentication in Windows article. After this step, it has to be created workspace folders by DBeaver.
C:\dbeaver-ce-7.0.0-win32.win32.x86_64\DBeaverData
└───workspace6
    ├───.metadata
    │   ├───.plugins
    │   │   ├───org.eclipse.core.resources
    │   │   │   ├───.history
    │   │   │   ├───.projects
    │   │   │   │   └───General
    │   │   │   ├───.root
    │   │   │   │   └───.indexes
    │   │   │   └───.safetable
    │   │   ├───org.eclipse.core.runtime
    │   │   │   └───.settings
    │   │   ├───org.eclipse.e4.ui.workbench.swt
    │   │   ├───org.eclipse.e4.workbench
    │   │   ├───org.eclipse.ui.workbench
    │   │   ├───org.jkiss.dbeaver.core
    │   │   │   └───security
    │   │   ├───org.jkiss.dbeaver.model
    │   │   └───org.jkiss.dbeaver.ui
    │   └───qmdb
    └───General
        ├───.dbeaver
        └───Scripts
The final step is to zip C:\dbeaver-ce-7.0.0-win32.win32.x86_64 DBeaver root folder. Your zipped file name is dbeaver-ce-7.0.0-win32.win32.x86_64.zip.
Deployment and Setup
Users get dbeaver-ce-7.0.0-win32.win32.x86_64.zip file and they need to unzip it in a desired folder.
If DBeaver has been set up in a network folder, it will be one limitation. You need to use mapped driver to run DBeaver, for example, Y:\myuser\desktop\dbeaver-ce-7.0.0-win32.win32.x86_64. It will not work if you run from \\networkserver\UserHome\myuser\desktop\dbeaver-ce-7.0.0-win32.win32.x86_64 folder. This limitation is caused by a reference to HiveJDBC41.jar library. You can run it from a network folder with UNC path but you need to make \\networkserver\UserHome\myuser\desktop\dbeaver-ce-7.0.0-win32.win32.x86_64 folder as your DBeaver root one and complete steps ## 1-6 in that folder.
Comments
comments powered by Disqus